Tour Composer: using the app (Alpha) - ENG

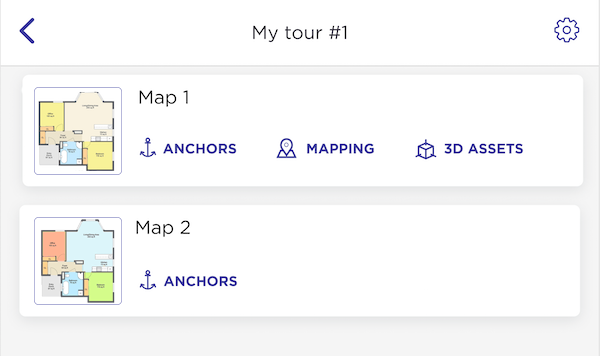
To set a tour for AR in Tour Composer, sign in to the app and open a tour from the list. Then follow the steps below.
Create anchors
- Tap Anchors in a floor plan container.
- In the popup, tap Start creating
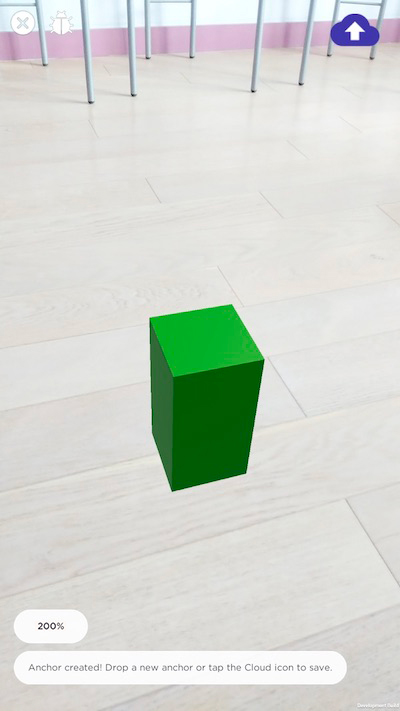
- Slowly scan the environment to detect surfaces.
- Around 200%, tap the floor at the center of the scanned surface to drop a first anchor (green cube).
- Wait until the "Saving..." message disappears and a cloud button appears at the top right corner of the screen.
- Walk 10 ft further and repeat steps 3 to 5.
.
- Reproduce the same process until you've scanned the whole area.
- Once done, tap the Cloud button at the top right corner of the screen.
You don't have to scan the whole area at one go. You can also choose to tap the Cloud button after having created several anchors and add more anchors later, as described below.
source : Microsoft
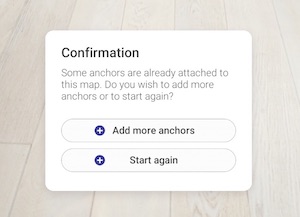
Add more anchors
- Make sure to stand inside the area you've already scanned, ideally close to the position of an existing anchor.
- Tap Anchors in the floor plan container.
- Select Add more anchors in the popup.
- Hover around a few seconds until the existing anchors appear accurately on the floor around you.
- Create new anchors by proceeding as before.
- Once done, tap the Cloud button at the top right corner of the screen.
To delete an anchor, simply tap its green cube then confirm in the popup. Note that you can't delete an anchor as long as it is not entirely created (cloud button visible).
Tap the bug icon near the exit button to activate /deactivate the debug mode.

Align 3D space with the floor plan (Mapping)
- Tap Mapping in the floor plan container (the button won't show if the plan has no anchors).
- Slowly hover the camera around until the message asking you to hover around disappears (devices supporting vibration feature should also vibrate).
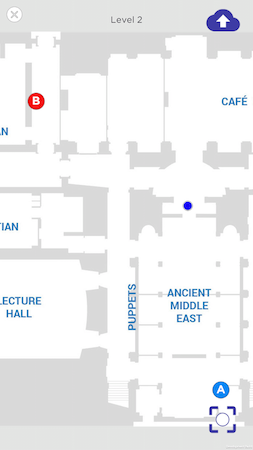
- Tap the cross-hair button at the bottom right corner of the screen to switch to AR view.
- Walk to an anchor at one end of the scanned area and tap Cube A. Position the blue cube near the anchor, then tap the check button.
- Walk to another anchor at the opposite end of the scanned area and tap Cube B. Position the red cube near the anchor, then tap the check button.
- Tap the Cloud button at the top right corner of the screen, then OK in the popup.
.
- Back to the floor plan, drag letters A and B to the exact position of cubes A and B..
- Tap the Cloud button, then OK in the popup.
- Exit by tapping the button at the top left corner.
Test localization
Once you have positioned anchors and completed the mapping process,
- Tap Mapping in a floor plan container.
- Slowly hover the camera around until the message asking you to hover around disappears (devices supporting vibration feature should also vibrate). You'll be localized on the floor plan with a blue dot.
- Check your localization on the floor plan as you move around inside the scanned area.
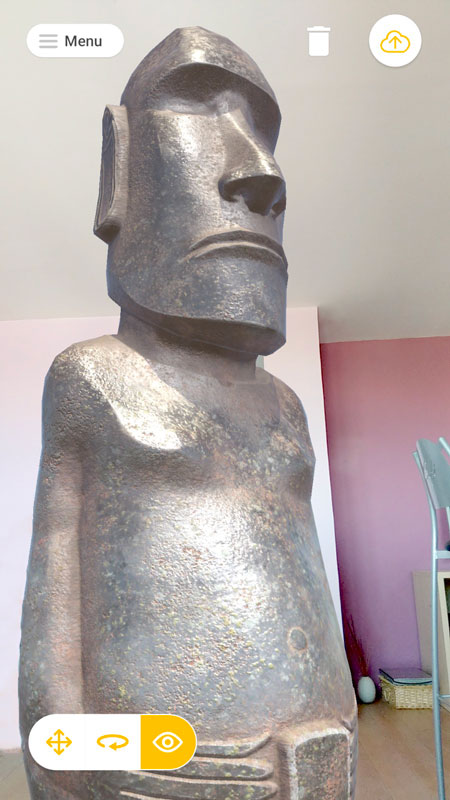
Position 3D assets
This step allows you to place 3D assets in the real world and save their exact position & rotation angle.
- Make sure to stand inside the area you have scanned, ideally close to the position of an anchor.
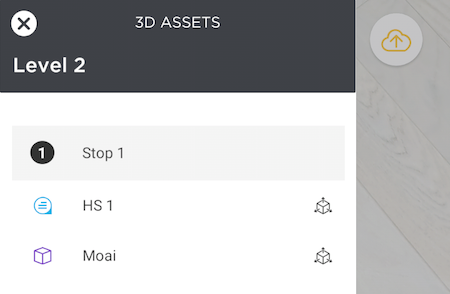
- Tap 3D assets in the floor plan container (the button won't show if the plan has no anchors).
- Slowly hover the camera around until the message asking you to hover around disappears (devices supporting vibration feature should also vibrate).
- Tap a stop in the left panel, then select an asset.
.
- After a few seconds, the asset will appear, semi-transparent.
- Aim your device at a flat surface where you want to position the asset, then tap the Cloud button at the top right corner of the screen.
To fine tune the position and rotation of the asset, use the toggle button on the left, then tap the +/- buttons to move/rotate the object along the 3 axes. The color of the +/- buttons corresponds to the color of the axes they adjust. Once you are satisfied with the asset’s position and rotation, tap the Cloud button to save.
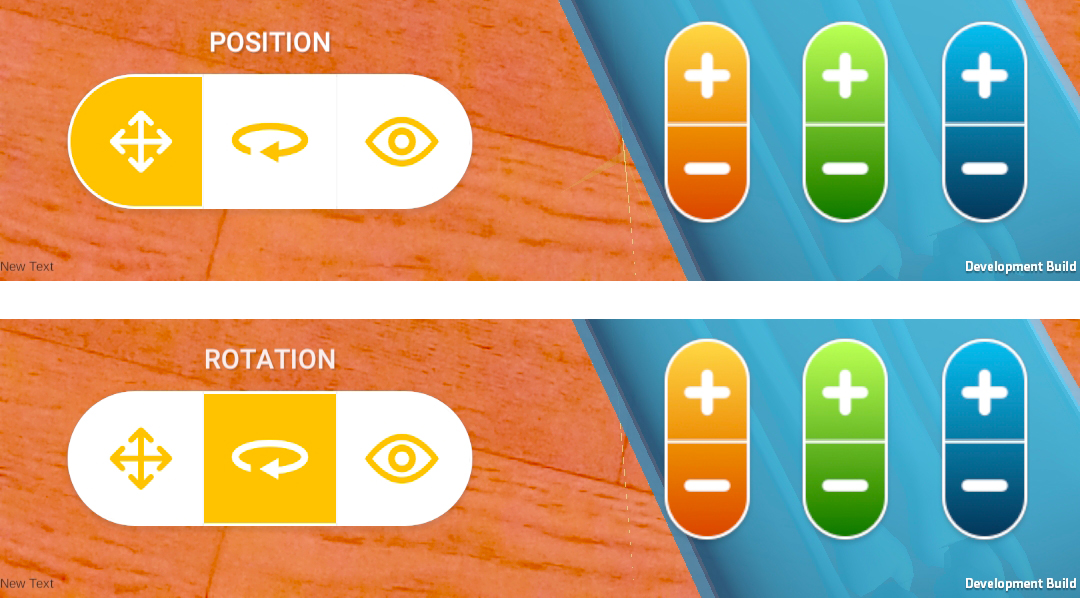
- Toggle to Preview to see the final result (with opaque asset and without axes).